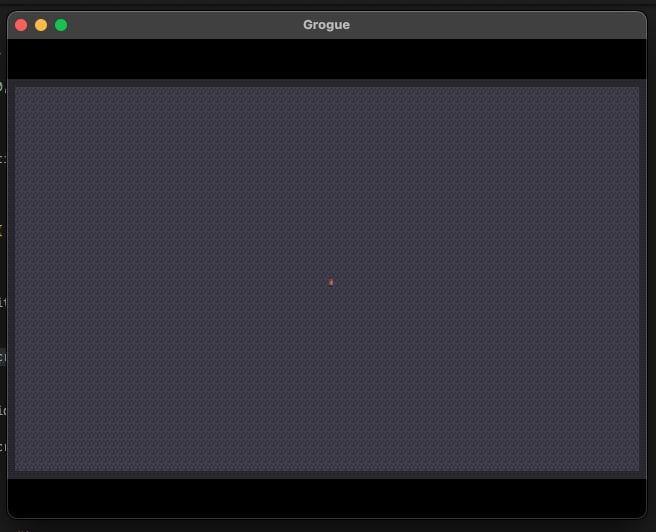
Now that we're drawing the map on the screen, we need to add a player and have them move around on the map. Before diving in and creating a Player structure, we should probably consider how we want to handle all of the creatures or entities that will be moving around the map.
Let's create a structure that represents not just the player, but just about everything we may want to represent on the map: enemies, items, and whatever else we dream up.
Create a new file called entity.go and add in the the following structure and constructor function:
package main

import (
    "github.com/hajimehoshi/ebiten/v2"
    "github.com/hajimehoshi/ebiten/v2/ebitenutil"
)

type Entity struct {
    X     int
    Y     int
    Image *ebiten.Image
}

// Create an Entity object at tile coordinates 'x, y' represented by a PNG named 'imageName'.
func NewEntity(x int, y int, imageName string) (Entity, error) {
    image, _, err := ebitenutil.NewImageFromFile("assets/" + imageName + ".png")
    if err != nil {
        return Entity{}, err
    }

    entity := Entity{
        X:     x,
        Y:     y,
        Image: image,
    }
    return entity, nil
}
This should look familiar, as it's very similar to what we did with MapTile{} in the previous part. Our constructor takes three arguments:
x: the tile coordinate on the x-axis of the mapy: the tile coordinate on the y-axis of the mapimageName: the root of the PNG filename in the assets folder that will represent this entity
As usual when loading an image, we return the error if there is one, otherwise, we return the new Entity{}.
The other function an entity needs is the ability to move. Let's add that now.
// Move the entity by a given amount.
func (entity *Entity) Move(dx int, dy int) {
    entity.X += dx
    entity.Y += dy
}
In main.go, add a slice of Entities.
type Game struct {
    Levels []Level
    Entity []Entity  // NEW
}
The player also needs to be instantiated in NewGame(). Add this block before the return statement.
    player, err := NewEntity(40, 25, "player")
    if err != nil {
        log.Fatal(err)
    }
    g.Entities = append(g.Entities, player)
We do need to add a player asset, so grab that here and save it as assets/player.png. This sprite is from Tri-Tachyon on OpenGameArt.
With that downloaded, we need a system to render all of our Entities on the map. Create a new file called render.go and add the following contents:
package main

import "github.com/hajimehoshi/ebiten/v2"

// Renders all of the entities in a given game onto screen.
func RenderEntities(g *Game, level Level, screen *ebiten.Image) {
    for _, entity := range g.Entities {
        idx := GetIndexFromCoords(entity.X, entity.Y)
        tile := level.Tiles[idx]
        op := &ebiten.DrawImageOptions{}
        op.GeoM.Translate(float64(tile.PixelX), float64(tile.PixelY))
        screen.DrawImage(entity.Image, op)
    }
}
This iterates though all of the Entities in game, determines where they belong on the screen, and draws them. Of course nothing calls this function yet, so nothing gets drawn, but we're about to change that. Add a call to the function at the end of the Draw() function in main.go:
RenderEntities(g, level, screen)Now, run the game using go run . and you'll see the player drawn in the middle of the screen.

Moving Around
With our player drawn on the screen, now we need to move them around. We'll want to make the player Entity a bit easier to access, though, so let's add a pointer to the player in the Game:
type Game struct {
    Levels   []Level
    Entities []Entity
    Player   *Entity  // NEW
}

// Creates a new Game object and initializes the data.
func NewGame() *Game {
    g := &Game{}
    g.Levels = append(g.Levels, NewLevel())

    player, err := NewEntity(40, 25, "player")
    if err != nil {
        log.Fatal(err)
    }
    g.Entities = append(g.Entities, player)
    g.Player = &g.Entities[0]  // NEW
    return g
}
We can now access the player using g.Player instead of having to determine where it is in the Entities slice. It would be nice if we could access the current level that way, too, so add a Level pointer called CurrentLevel to the Game structure:
CurrentLevel *Leveland assign it in NewGame() after appending NewLevel() to g.Levels:
g.CurrentLevel = &g.Levels[0]This will be very useful when we have more than just a single level.
Now create a new file called event.go and include the following:
package main

import "github.com/hajimehoshi/ebiten/v2"

// Handle user input, including moving the player.
func HandleInput(g *Game) {
    dx := 0
    dy := 0

    // Player Movement
    if ebiten.IsKeyPressed(ebiten.KeyW) {
        dy = -1
    } else if ebiten.IsKeyPressed(ebiten.KeyS) {
        dy = 1
    }
    if ebiten.IsKeyPressed(ebiten.KeyA) {
        dx = -1
    } else if ebiten.IsKeyPressed(ebiten.KeyD) {
        dx = 1
    }

    newPos := GetIndexFromCoords(g.Player.X+dx, g.Player.Y+dy)
    tile := g.CurrentLevel.Tiles[newPos]
    if !tile.Blocked {
        g.Player.X += dx
        g.Player.Y += dy
    }
}
This function checks for WASD key inputs and sets the movement delta appropriately. Then, it finds the tile that the movement would put the player in and checks to see if it is blocked. If it's not, we move adjust the player's position appropriately.
Add a call to this new function at the top of Update() in main.go:
HandleInput(g)
then run the game. Use the WASD keys and watch the player zip around the screen (we'll fix the speed later).

Part 2 is now complete! We've laid the groundwork for generating dungeons and moving through them and will start building actual dungeons in the next part.
You can view the complete source code here and if you have any questions, please feel free to ask them in the comments.